Showing posts with label Side Dishes. Show all posts

Wednesday, September 25, 2013

Orzo Salad

One of my favorite side dishes to make is my orzo pasta salad. A sweet and tangy dressing with fresh dill tossed with orzo pasta, fresh vegetables, dried cherries, golden raisins, and walnuts. It may not sound like an obvious combination of ingredients but they all blend perfectly together and this salad has been a huge hit with everyone I've served it to. A large helping of this salad is great for a lite dinner but It's also the perfect side dish for grilled chicken breast or with a sandwich for lunch!


1 box of Orzo Pasta
1 Large Shallot
1 Small Orange Bell Pepper
1 Small Red Bell Pepper
1 Large Cucumber
1/2 cup of Golden Raisins
1/2 cup of Dried Cherries
1/4 cup of roughly chopped Walnuts
For the dressing
1 Garlic clove (Grated or finely minced)
1 handful of Fresh Dill (Don't use dried)
Kosher Salt and Black Pepper
3/4 cup of Vegetable Oil
1/4 cup of Apple Cider Vinegar
1 teaspoon of granulated Sugar
1 tablespoon of Dijon Mustard

Start by boiling the orzo pasta in salted water and cook according to the instructions on the package until the pasta is Al Dente. For the dressing, remove the dill from the stem and chop finely chop. Add the dill to a mixing bowl and add the garlic clove, dijon mustard, sugar, oil and vinegar, and salt and pepper. Whisk the dressing together and season to taste. It should be strongly flavored.
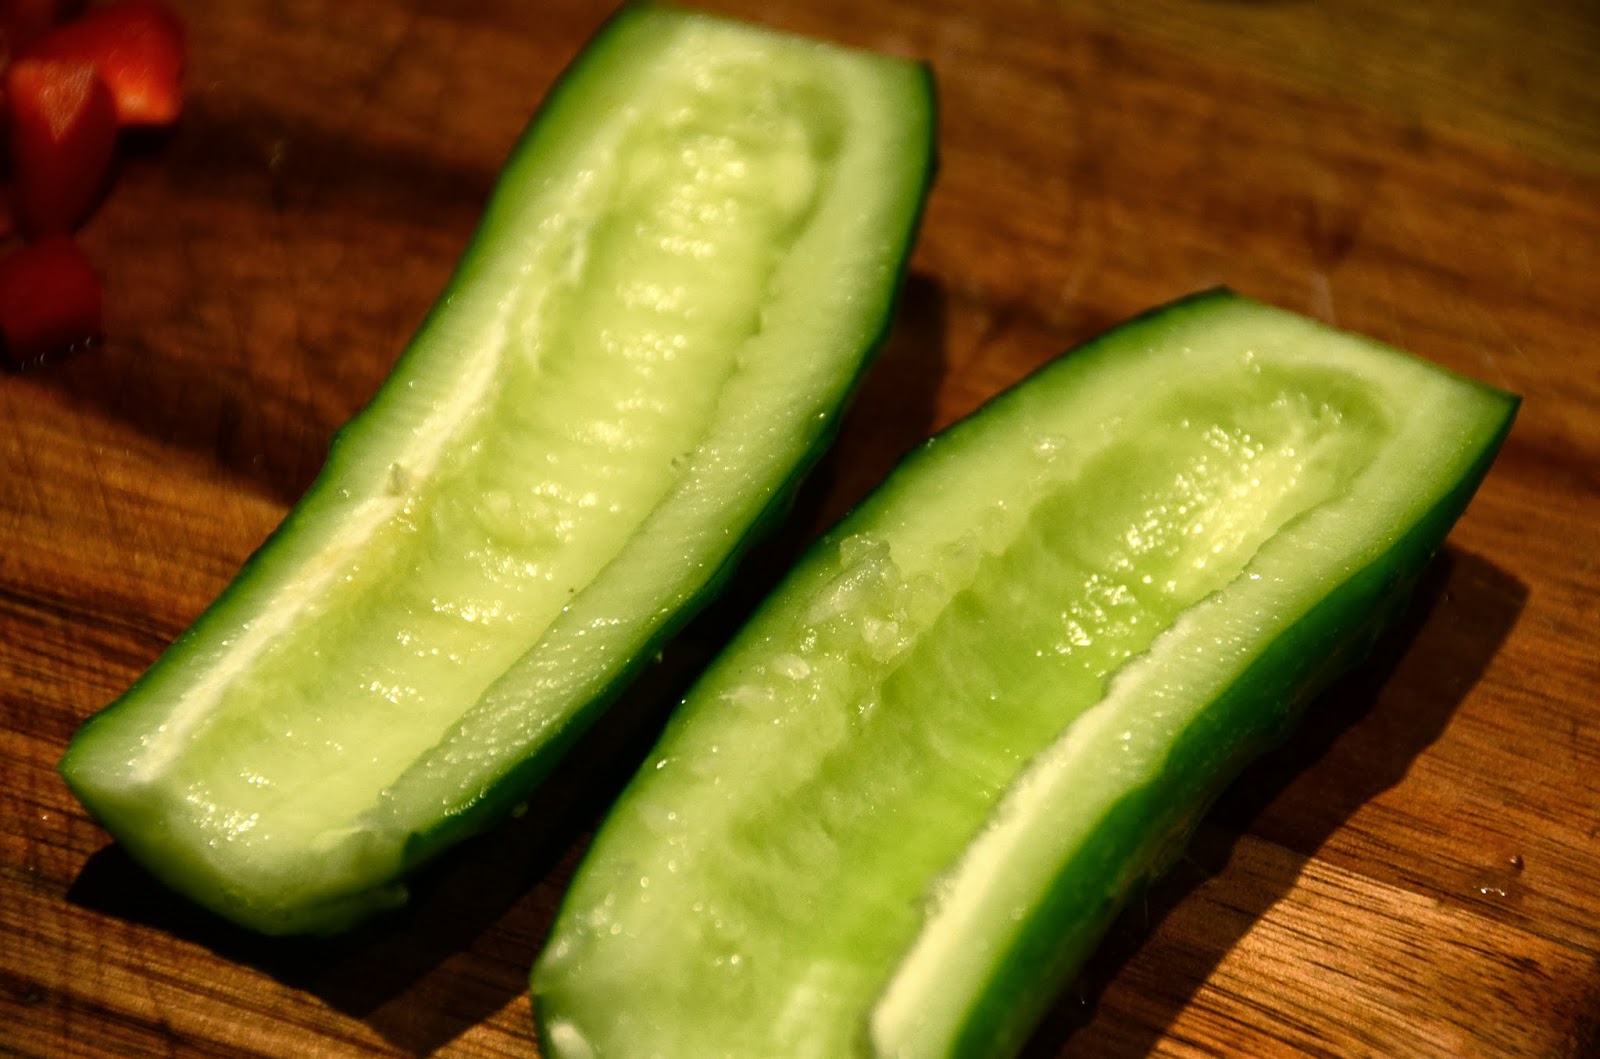
Wash the bell peppers and chop them into small dices. For the cucumber, cut in half and take a spoon to scoop out the juicy middle and the seeds. Slice the cucumber into medium slices. Roughly cut the shallot and set the vegetables aside.

Once the orzo is cooked, drain the pasta and mix with about half of the dressing. Adding some of the dressing to the orzo immediately will help it from sticking and the warm orzo will absorb the flavors of the dressing. Allow the orzo to cool in the refrigerator for about 20-30 minutes. Once cooled, add the remaining the dressing to the orzo. Mix in the chopped vegetables, the dried cherries and raisins, and the walnuts. Stir together to combine and serve chilled.


Friday, September 6, 2013

Oven Roasted Vegetables

Looking for a new healthy side dish for tonight's dinner other than steamed vegetables or a garden salad? Roasting vegetables in a very hot oven is one of my favorite ways to prepare them. I was first shown the concept of cooking them this way by Ina Garten and I've been making them this way ever since. The natural sweetness comes out of the vegetables when you roasted them and they really have so much more flavor then just blanching and steaming them. The great part is you can use just about any vegetable you'd like. Our garden produced quite a few tomatoes this year, green beans, Bell Peppers, and more summer squash than we know what to do with.

To make these roasted vegetables all you need is:
You're selected Vegetables 
A Large sheet pan
Some olive oil
Diced onion
1 clove of chopped garlic
Salt and Black pepper
Some Freshly chopped herbs like Basil, Parsley, or Dill.

Toss everything together on the pan so the vegetables have an even coating of oil and roast them in a 425 degree oven for about 30 to 40 minutes. My favorite combo of veggies to roast for this time of year are squash, tomatoes, carrots, string beans, and bell peppers but you can use just about any kind you'd like

Friday, July 26, 2013

French Style Potato Salad

There is a fine line for me when it comes to the amount of mayonnaise. With that being said I obviously have never been a fan of most potato salads with a mayo base to them, not to mention most of them have hard boiled eggs - my nemesis!!! I was thrilled a few years back when I was introduced to French potato salad which has a Dijon vinaigrette base to it, diced shallots, and a ton of fresh herbs. It's the perfect side dish for a picnic and any summertime meal. You can use any potatoes you have on hand, but I personally think red potatoes taste better, look better because you can leave the skins on, and they hold up better in this salad.

1 lb of potatoes (Red potatoes work best)
1 large shallot
1 tablespoon of freshly chopped Dill
1 tablespoon of freshly chopped Chives
1/3 cup of olive oil
3 tablespoons of white wine vinegar
1 tablespoon of Dijon mustard
Kosher Salt and Black Pepper
Fresh Flat Leaf Parsley

Cut the potatoes into even bite sized cubes so they cook evenly. If you're using baby potatoes, just cutting them in half will do. Fill a pot large enough to hold all the potatoes with water and drop the potatoes in. Optionally, add a little white wine and chicken stock or bullion to the potato water to give them more flavor. Cook until the potatoes are just cooked through (Tender when pierced).

While the potatoes are cooking, cut the shallot into small dices and set aside. To make our dressing, whisk the oil, vinegar, mustard, the fresh dill and chives, and the salt and pepper together until the dressing emulsifies.

Drain the potatoes and allow them to cool for a few minutes. Place the potatoes in a large bowl and pour about 1/2 of our dressing over the warm potatoes and gently toss together. Let the potatoes cool for a few more minutes before adding the rest of our dressing, the shallots, and the parsley. Toss gently together and season to taste. You can serve the salad warm, room temperature, or cold!


Friday, July 12, 2013

Twice Baked Potatoes

Twice baked-potatoes are one of my favorite side dishes. As a side dish, sometimes a potato can get a little boring and this is a great way to change things up a bit. That was the case for me the other night when my pantry was getting a bit thin and all I had left was a bag of potatoes. Not really thrilled with the idea of a plain old baked potato to go with dinner, I thought I'd take them to the next level by making twice baked. These potatoes are great with anything but they'll be perfect next to a juicy grilled steak or a rack of BBQ ribs! They're sure to please everyone at your dinner table.

4 Large russet potatoes
4 tablespoons of butter
2 scallions chopped
1/2 cup of cheddar or Monterey Jack cheese
1/2 teaspoon of garlic powder
1/4 cup of half and half or heavy cream
Salt and Pepper
Freshly cut chives

Preheat your oven to 400 degrees. Wash your potatoes underneath cold water to remove any dirt from their skin and then dry them with a paper towel. Pierce the skin with a knife or a fork in a few spots in the potatoes and place them in the oven to bake for about an hour and fifteen minutes until they are full cooked.
Once the potatoes are baked and have cooled slightly so that you can handle them, cut the potatoes in half length ways and scoop out the inside of the potato into a mixing bowl. Do this with all four potatoes.
Once you've removed the inside of all the potatoes and added them to your bowl, it's time to add the rest of our ingredients. Add the butter, garlic powder, 1/4 cup of our shredded cheese, salt and pepper, cream, and the scallions. Mix well until the butter and cheese have melted and all the ingredients have blended. Taste a bit of the filling and season to your taste. **An optional ingredient here could be some fresh bacon bits** Fill the potato skin shells up with the filling and top with the remaining shredded cheese. 

Place the potatoes back in the oven and bake until the cheese on top has melted and browned slightly. Sprinkle the freshly chopped chives over top and serve hot next to your main course.


Friday, July 5, 2013

Quick Arugula and Spinach Salad

This arugula and spinach salad is quick, healthy, delicious, and a bit of a change up from your every day garden salad. Lightly tossed with a lemon Dijon dressing and some freshly shaved Parmesan cheese over top, it's a great side dish for any main course. Slice some freshly grilled chicken over top for a quick weeknight meal!


About 4 ounces of baby Arugula (3 big hand fulls)
About 2 ounces of baby Spinach (1 big hand full)
Freshly shaved Parmesan cheese
Zest of one Lemon
1/4 of a cup combined of of Freshly squeezed lemon juice and white wine vinegar
1/2 cup of extra virgin olive oil
1 tablespoon of Dijon mustard
1/4 teaspoon of garlic powder
Kosher salt and freshly cracked black pepper

To make the dressing, first remove the zest from your lemon and place in a mixing bowl. Next, juice the lemon into a glass measuring cup. Some lemons are juicer than others so the exact amount of juice you'll get will vary. Pour in the white wine vinegar until you have a total of 1/4 of a cup between both the lemon juice and vinegar. Add the olive oil, mustard, garlic powder, and the salt and pepper. Whisk everything together until it emulsifies into a dressing.

Wash and dry the arugula and baby spinach and toss the two together. Portion out a serving of the greens and use a vegetable peeler to shave some Parmesan over top. Dress the salad with a bit of our lemony dressing and serve!

Friday, March 29, 2013

Oven roasted purple potatoes

 A new twist to a classic side dish. There are few meals that I can think of that a side of potatoes don't go well with. You can find these tiny purple potatoes pretty regularly now in your local markets, they even come in bags mixed with white, red, and purple which look great for presentation. These purple "spuds" taste just like a regular potato and have tender skins.


24 oz bag or Purple potatoes
3 tablespoons of olive oil
2 tablespoons of freshly chopped dill
1 clove of finely minced garlic
Kosher Salt and freshly cracked black pepper
Freshly chopped Parsley. 

Preheat oven to 400 degrees.

In a large mixing bowl - combine the olive oil, chopped dill, minced garlic, and about a teaspoon of kosher salt and ½ teaspoon of pepper. Add the potatoes and toss them thoroughly in the oil and the spices. If the potatoes seem on the larger side, cut them into halves so they cook quicker. Dump to potatoes onto a large sheet pan and sprinkle with more kosher salt. Place the potatoes in the oven and bake for about 30-35 minutes or until the potatoes are tender when you pierce them with a fork. Add freshly chopped parsley once the potatoes are roasted and serve hot.


Friday, March 22, 2013

Buttermilk Cheddar Biscuits

Why grab a cylinder of packaged biscuits from the grocery store to bake at home when you can whip up a batch from scratch in about the same amount of time? They're light years better than any brand you'll find and they'll taste even better knowing that you made them yourself! I made these biscuits to go with my clam chowder so I added some ingredients to go along with that but you can leave them plain or experiment with your own flavors. This recipe will make 8 biscuits.

2 cups of all-purpose flour
1 tablespoon of baking powder
1 teaspoon of kosher salt
¼ teaspoon of baking powder
A few cracks of freshly cracked black pepper
1 cup of buttermilk
6 tablespoons of very cold butter
The remaining ingredients are optional
¼ cup of shredded cheddar cheese
½ teaspoon of Old Bay seasoning
¼ teaspoon of garlic powder
¼ teaspoon of lemon zest
1 tablespoon of freshly chopped dill
1 tablespoon of freshly chopped parsley

Preheat your oven to 450 degrees and line a baking tray with parchment paper.

Sift together flour, baking powder, salt, and the baking soda into a large mixing bowl. If you don't have a sifter just run a wire whisk through the dry ingredients to incorporate them and to make sure there aren't any lumps. If you have a food processor just add all the dry ingredients into the bowl fitted with a bald attachment to make these biscuits even quicker and easier. To the flour mixture - add the pepper, old bay seasoning, and garlic powder.
 
Cut the the butter into small chunks and add it to the flour. Using a pastry cutter, a whisk, a fork, or your food processor - work the butter into the flour until the mixture is very coarse and resembles corn meal. You'll still be able to see very small pieces of butter but that's what we're looking for. The trick to making a flaky biscuit is cold butter. When we place these biscuits in the oven, the butter melts and the steam from the melting butter is what gives us that desired flakiness in our biscuits. 

Next - add the lemon zest, chopped dill, chopped parsley, and the shredded cheese to the flour. Pour in the buttermilk and stir everything together just until everything is combined - don't over mix. You may need an extra splash or two of buttermilk if the dough appears on the dry side. It should be a very wet and a very sticky dough.

Sprinkle a little bit of flour on a clean and flat working space and scoop the dough out of the bowl. Be gentle with the dough here and don't roll it out. Put a little flour on your hands and gently pat the dough out so that it's about an inch thick or so. Fold the dough over and gently pat the dough back out. Do this 3 times and on the final fold pat the dough out again so it's about an inch thick.

Now use a round cutter to cut out the biscuits. Press down firmly to cut the biscuits. Cut the biscuits as close as possible to each other so we don't have a lot of leftover dough. We can combine the scraps back together but the texture won't quite be the same. Place the biscuits on the prepared cookie sheet and place them right next to each other. Place the biscuits in the oven and bake for 10-12 minutes until golden brown.


Friday, March 15, 2013

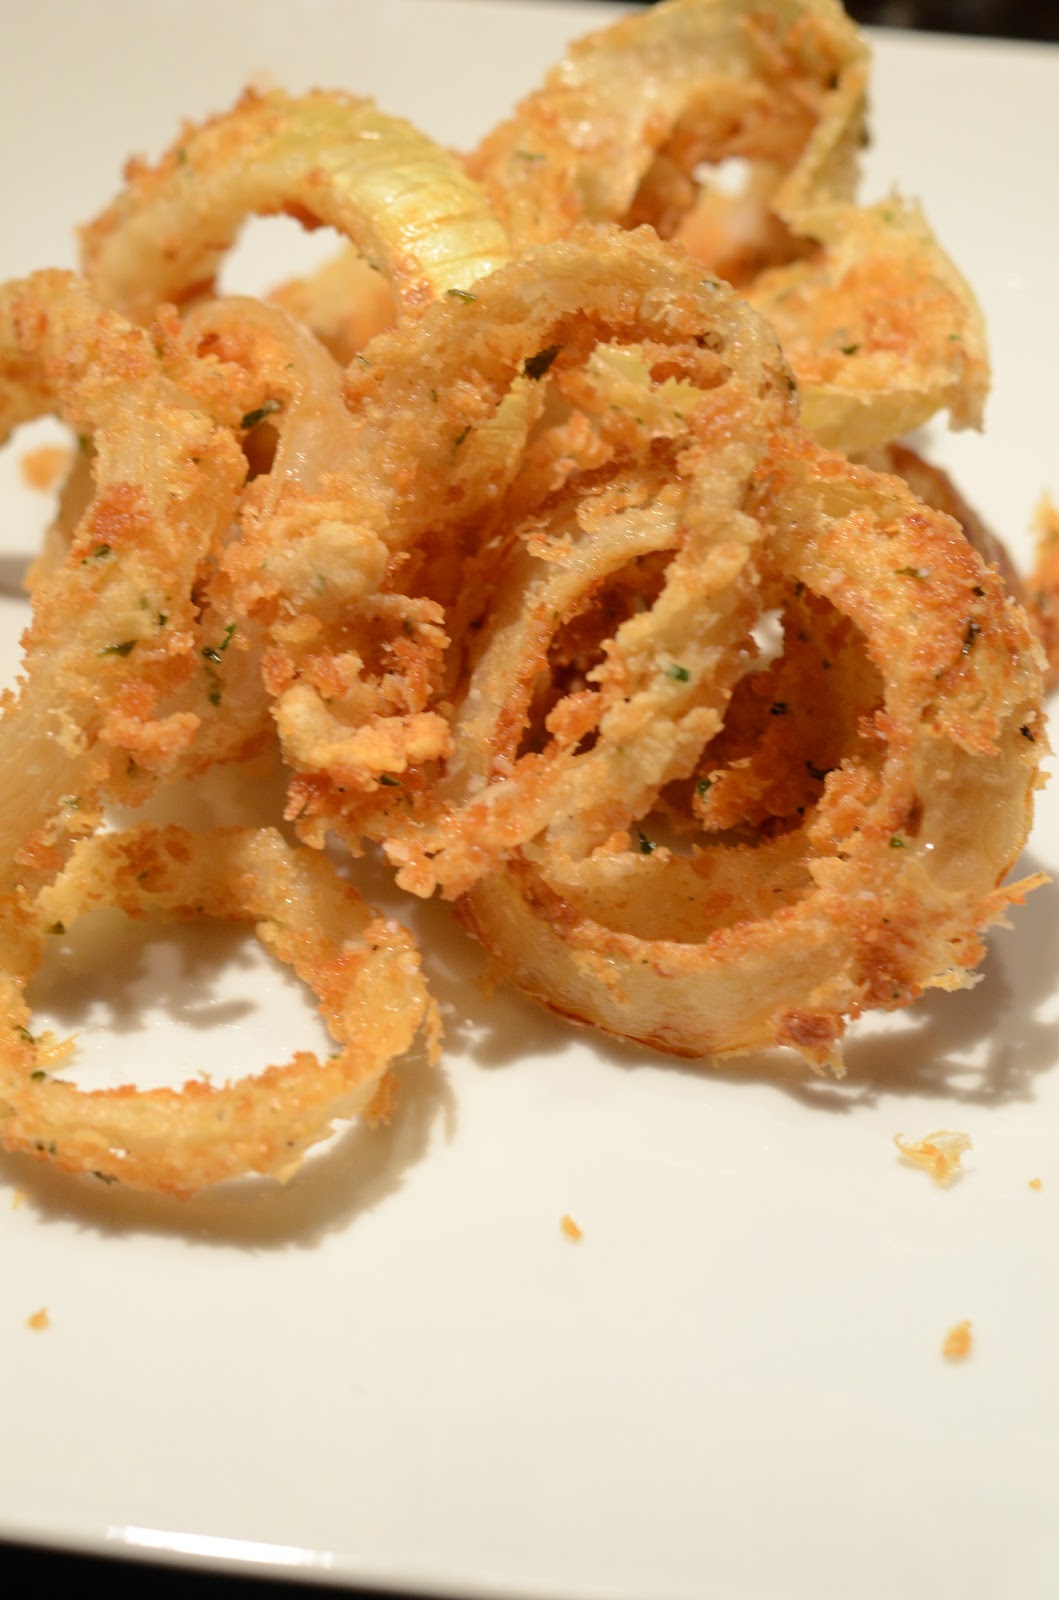
Onion Rings

One of my favorite fried foods is a golden brown, crispy, and delicious onion ring. Great next to a juicy grilled burger or even on their own, they're a special treat I like to make for myself and my family/friends once in a while when we want something fried and salty. Most onion rings are either beer battered or have a floury and crisp coating on the outside. To be honest, I'm not a huge fan of the beer battered onion rings. It always seems like the entire onion comes out of the fried batter when you take the first bite. That's not an issue with these onion rings! Coated with flour and panko bread crumbs - every bite will be crispy and delicious!

2 very large onions (Spanish or Vidalia)
2 cups of butter milk
1 ½ cups of flour
½ cup of Panko bread crumbs
Kosher Salt
Freshly ground black pepper
Vegetable or Peanut Oil for frying


Peel and slice the onions into large slices about a ½ inch thick or so. Separate the onion slices into individual rings. In a large mixing bowl, add the buttermilk and stir in 1 teaspoon of kosher salt and a ½ teaspoon of black pepper. Add the onions to the buttermilk mixture and let them soak for 30 minutes.

In a separate bowl, combine the flour and bread crumbs with 1 teaspoon of salt and black pepper. Mix together and set aside.

Once you're ready to fry the onion rings, fill your deep fryer to the recommended fill line. If you're using a pot to fry, add enough oil so that the oil line is about 2 to 3 inches above the bottom of the pan. Heat the oil to about 350-375 degrees over a medium high heat. Take a cookie sheet or a large platter and line with a few paper towels. We'll use this to let the onion rings drain off any excess oil once they're fried.

In small batches, take the onion rings out of the buttermilk (allow some of the milk to drip off) and dredge the onions in the flour and bread crumb mixture. Coat the onions well. Test the oil by carefully dropping one onion ring into the oil. You should see bubbles immediately around the onion ring and it should float towards the top of the oil. Fry the onion rings in small batches, if we add too many at once the temperature of our oil will lower and we won't get an even fry. Patience when cooking goes a long way my friends!

Fry the onions for about 2 to 3 minutes. Turn the onion rings once about half way through their fry time. Once they're golden brown and crisp, use a pair of metal tongs or a wire spider to carefully remove them from the hot oil. Place the onion rings on the paper towels to drain and continue to fry the rest. Season with salt while the onion rings are still hot. You can keep the onion rings warm in a 200 degree oven until you've fried them all.


Friday, March 8, 2013

Oven Roasted Carrots


I've always loved raw carrots but there was something about a steamed or a blanch carrot with butter that made me despise them!! It wasn't until I was taught about the wonders of oven roasted vegetables that I looked forward to eating cooked carrots. When you roast them in a very hot oven, the natural sugars in the carrots caramelize and they get such a sweet and delicious flavor. I'm confident after over roasting these carrots you'll never steam them again.

12 carrots
1 tablespoon of softened butter
2 tablespoons of olive oil
1 teaspoon of Kosher salt 
½ teaspoon of black pepper 
½ teaspoon of dried thyme

Preheat oven to 425 degrees

Peel the carrots and cut them diagonally in about 1 inch slices. If some of the carrot slices are larger than others, slice them in half so they're all similar in size. In a large mixing bowl. toss the sliced carrots with the softened butter and the olive oil until coated. Add the salt, pepper, and the dried thyme and toss once again to coat all of the carrot slices with the seasonings.

Transfer the carrots to a sheet pan and place in the oven and bake for 20 minutes. The carrots will be tender and crisp on the outside. Transfer to serving dish and serve hot. A perfect, easy, healthy, and delicious side dish for any meal.

Friday, February 1, 2013

Fresh Cut French Fries

Some of you may remember an earlier blog post where I gave my recipe for cheeseburger sliders and fresh cut french fries. Since this Sunday is the Superbowl and french fries go with just about everything, I thought I'd share with you again how to make homemade fries. Believe me, they are so much better than store bought. The key to the perfect french fry is frying it once to just about cook the potato all the way through. Then after after it cools slightly, give it one last final fry to crisp up the outside and make them golden brown and delicious.

Serves between 5-6 people
6 large Russet or Idaho potatoes
Peanut or Vegetable oil
Salt and Pepper

Peel the potatoes and use either a french fry cutter or a knife to cut the potatoes. A french fry cutter is the ideal tool here but a knife will work just fine, just be mindful that when you're cutting your fries they are all fairly similar in size and shape so they cook evenly. Fill a large bowl with very cold tap water and wash the cut fries thoroughly to wash off the starch. Drain the starchy water off the potatoes and rinse once more. When the water in the bowl is no longer cloudy, drain the fries and allow them to rest on a towel for a few minutes and pat the fries dry with another towel to get off any excess moisture.

Next step is to heat your oil either in a deep fryer or a large pot. Add enough oil as your deep fryer recommends or fill a pot about 4 or 5 inches full of oil.  Heat the oil to around 325 degrees. Use the gauge on your deep fryer or a candy thermometer to determine the oils exact temperature. Another tip to determine if your oil is hot enough is to stick the handle of a wooden spoon into the oil, if your oil is ready for frying it should bubble up around the wooden handle. Drop the fries in the oil in small batches and fry for about 5 minutes and carefully remove from the oil using tongs, a metal spider, or a slotted spoon. Drain the fries on paper towels and continue frying the fresh of the potatoes. You can keep the par cooked fries warm in a 250 degree oven while you cook the rest of them. Once all the fries have been given their first bath in the oil, drop the fries back in for the final fry. This should take about 2 to 3 minutes or just until you see the fries turn golden brown. Remove the fries from the oil, pat off any excess grease, and season with salt and pepper.

Friday, November 23, 2012

Perfect Green Beans

A side of green beans is a perfect vegetable to have with any meal your serving up during the holidays or throughout the rest of the year. They're nutritious, quick and easy to prepare, and readily available all year long. There is a certain procedure though in cooking green beans to ensure they keep their bright green color and stay nice and crisp rather than dull, dingy, and waterlogged. A little bit of sauteed garlic is a great flavor to compliment the green beans.

For a serving 4 people

About a ½ lb of fresh Green Beans
2 cloves of chopped garlic
1 tablespoon of butter
A drizzle of olive oil
¼ teaspoon of kosher salt
Freshly cracked pepper

Trim the ends off of your green beans and wash thoroughly. In a large bowl, add ice and very cold tap water so that it's about half way full. Bring a pot of water up to a rolling boil, season the water with a little salt, and submerge the green beans into the water for no more than 4 to 5 minutes. Drain the green beans and immediately place them in the bowl off ice water. Taking the green beans straight from the boiling water to the ice water will shock them by stopping the cooking process and they'll keep their fresh green color. Leave the green beans set in the ice bath for about a minute or so, then remove and allow them to drain.

Chop the two cloves of garlic and in a sauté melt together the butter with a little bit of olive oil.Sauté the garlic for 1 minute and then add the green beans straight into the sauté pan. Toss together to make sure the green beans get and even coating of the butter and oil mixture, add another drizzle of olive oil if not. Cook just until the green beans are heated through. Season with the salt and a few fresh cracks of black and serve along side any main dish.

Friday, November 2, 2012

Twice Baked Yam Casserole

Hi all, and happy Friday to you. I first would like to send my apologies to anyone who stopped by Wednesday expecting to see my usual dinner and a movie post. The affects of hurricane Sandy reached all the way out here in North Eastern Pennsylvania and I was without power for a couple days. I would also like to take this time to send my thoughts out to any of you or your family members who were caught in the storms path.


Autumn may not officially end until late December, but as far as I’m concerned once all the leaves have fallen the season has ended for another year. It’s hard to believe but Thanksgiving is less than three weeks away!! Christmas and the rest of the holidays will be sneaking right up on us as well. For the month of November and December, as my Friday food posts I’m going to share with you some of my favorite side dishes and deserts to go with any holiday meal. We’re going to start with one of my new favorites, Twice Baked Yam Casserole.
 
Serves 12 (I usually use do 1 large yam per two people so adjust the recipe to however many you are serving)

6 large yams
6 tablespoons of butter
6 tablespoons of brown sugar
6 tablespoons of heavy cream
½ teaspoon of cinnamon
¼ teaspoon of nutmeg
1 teaspoon of salt
1 cup of chopped walnuts or pecans (optional)
1 bag mini marshmallows - If you have large marshmallows already at home just cut them into small pieces.

Pre-heat your oven to 375 degrees and wash the yams thoroughly. Take a fork or a sharp knife and carefully poke a few wholes into the yams. This will help them bake faster and will allow the steam to escape. Line a baking tray with tin foil and place the yams on top. Bake the yams for about one hour or until they are very tender when your piece them with a fork. The timing all depends on the actual size of the yam. Remove from the oven and allow the yams to cool slightly.

Once you can handle the yams, remove their skins and place them in a large mixing bowl. Add the butter, brown sugar, heavy cream, cinnamon, nutmeg, and salt. Use a hand mixer or potato masher to whip all the ingredients together. Season to taste.

Spread the whipped yams into a lightly greased 9x12 baking dish (Smaller or larger depending on how much you’re making.) Sprinkle the chopped nuts over top and then add the mini marshmallows. I add just enough so that the top is almost covered but you can still see the yams underneath it. Place the baking dish back into the oven and lower the heat to 350. Bake for about 10 to 15 minutes or until the marshmallows are golden brown.